 how-to
Avoiding Bubbles in Resin Projects: A Step-by-Step Guide
Table of Contents
- Why Bubbles Form in Resin and How to Prevent Them
- Prepare Your Resin and Hardener Before Mixing
- How to Get Bubbles Out of Resin During Mixing
- Deep Pour Epoxy Without Bubbles: Layering and Timing
- Using a Heat Gun on Resin to Release Surface Bubbles
- Sealing Porous Materials Before Resin Pour
- Troubleshooting Bubbles After Curing
- Frequently Asked Questions
Last Updated: October 14, 2026
Why Bubbles Form in Resin and How to Prevent Them
Avoiding bubbles in resin projects starts with understanding where they come from. Bubbles form when air gets trapped during mixing, pouring, or curing.
The good news: most bubbles are preventable. Bubble prevention comes down to controlling three things: temperature, mixing technique, and pouring speed.
Bubbles happen for specific reasons:
- Vigorous mixing introduces excess air into the resin
- Cold resin has high viscosity, trapping air inside
- Fast pouring creates turbulence that captures bubbles
The key insight most beginners miss: avoiding bubbles in resin isn't about fighting them after they form, but preventing them in the first place.
Prepare Your Resin and Hardener Before Mixing
Preparation is where bubble prevention begins, yet most people skip it and wonder why their resin turns cloudy.
Start by warming your resin and hardener separately. Cold resin is thick and traps air; warm resin flows smoothly and releases trapped air more easily.
Here's the process:
- Place bottles in warm water, Use a water bath, not direct heat. Fill a bowl with warm water (not hot). Set your resin and hardener bottles in the water for 10-15 minutes.
- Check the temperature, Resin should feel warm to the touch, not hot. Overheating damages the material.
- Let it sit after heating, Wait 5 minutes before mixing. This allows any air introduced during heating to rise and escape.
- Keep your workspace warm, Room temperature should be at least 70°F. Cold spaces cause resin to stay thick.
Why this matters: warm resin has lower viscosity, so air bubbles escape more easily during mixing and pouring.
How to Get Bubbles Out of Resin During Mixing
How to get bubbles out of resin during mixing is where technique matters most, the moment most projects succeed or fail.
The biggest mistake is mixing fast, which introduces air. You want slow, steady mixing instead.
Follow this mixing process:
- Pour hardener into resin, Never the other way around. Use the ratio specified on your product label.
- Stir slowly for 2-3 minutes, Use a wooden stick or plastic stirrer. Move it in gentle, continuous circles. Think of folding rather than whipping.
- Scrape the sides and bottom, Air gets trapped in corners. Push the stirrer along the bottom and sides of the cup.
- Keep the stirrer submerged, Don't lift it above the surface. Lifting introduces air.
- Stop when fully mixed, The mixture should be uniform in color with no streaks. This usually takes 2-3 minutes.
Slow mixing combines resin and hardener without creating air pockets. Fast mixing creates tiny bubbles throughout the mixture that are nearly impossible to remove later.
Deep Pour Epoxy Without Bubbles: Layering and Timing
Deep pour epoxy without bubbles requires a different strategy than shallow pours. Thick layers trap air. Thin layers release it.
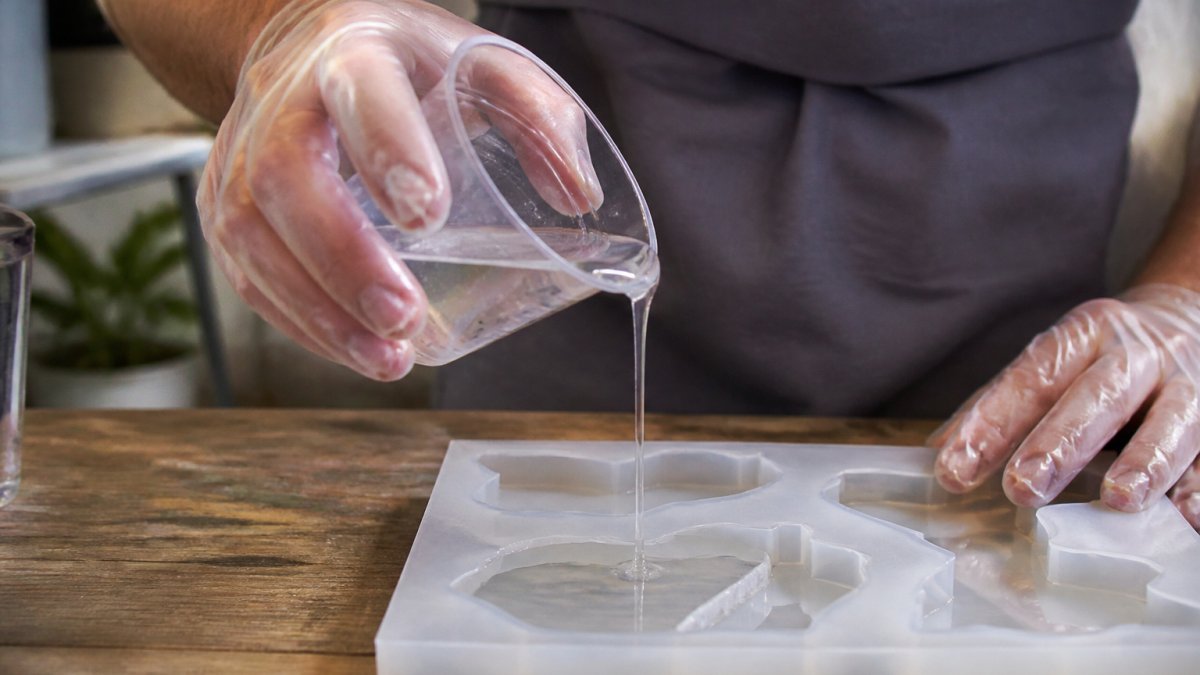
The solution is layering, pouring in multiple thin layers instead of one thick pour, using the seal coat and layered pour method.
Here's how to do it:
- Pour a thin seal coat first, This is a thin layer (about 1/8 inch) poured over your mold or base. It seals porous surfaces and prevents air from rising through them.
- Let it set partially, Wait for the seal coat to become tacky (usually 2-4 hours, depending on your resin type). It should feel sticky but not wet.
- Pour your next layer, Pour another thin layer on top. Keep each layer under 1/4 inch thick.
- Repeat until you reach your desired depth, Most projects need 2-4 layers.
- Wait for full cure between major layers, If you're pouring a thick section, wait for the previous layer to fully cure before adding more weight on top.
Why layering works: each thin layer cures more completely. Trapped air has time to rise and escape.
For deep projects, slow-setting resin gives air more time to rise before the material hardens; standard resin cures faster, leaving less time for bubble escape.
Using a Heat Gun on Resin to Release Surface Bubbles
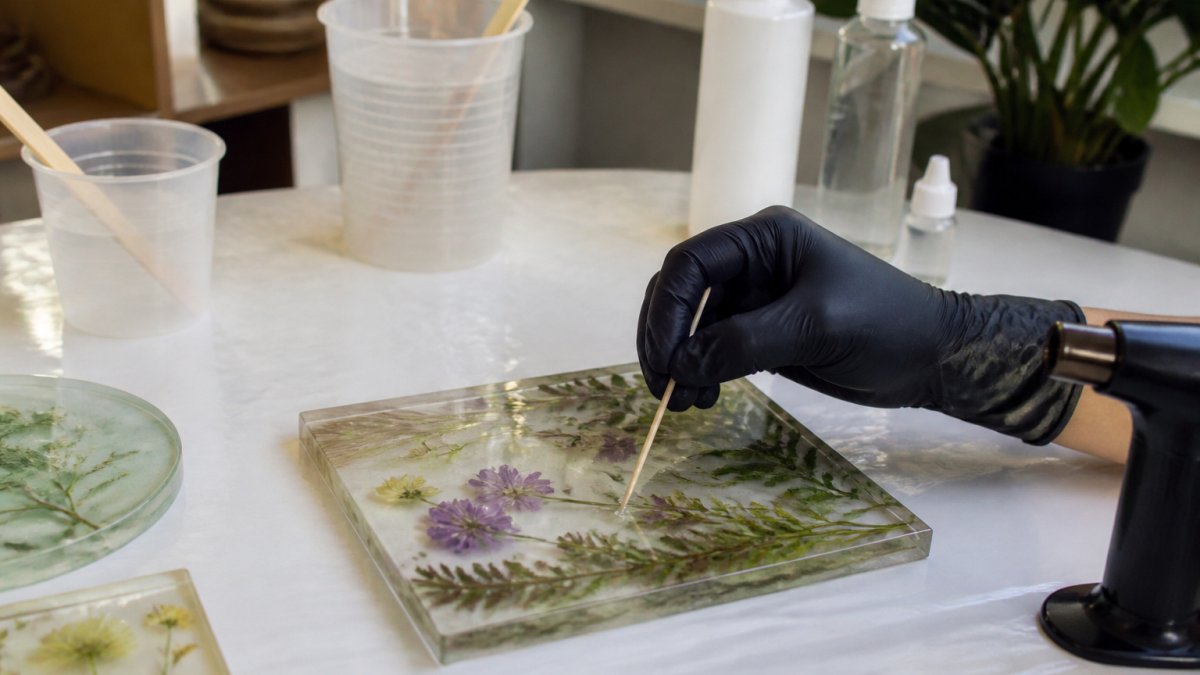
A heat gun is the fastest way to clear surface bubbles right after a pour, but it's also where most workshop accidents and ruined pours happen. Treat it as a controlled tool, not a quick pass.
Heat lowers resin viscosity, so bubbles rise and pop at the surface. The window is short: work in the first 5-10 minutes after pouring, before the resin gels.
Safe technique
- Hold the nozzle 6-8 inches above the surface. Closer risks scorching, yellowing, or igniting stray material; farther does nothing.
- Keep the gun moving. Sweep in slow, overlapping passes. Never park it over one spot.
- Use low to medium heat. High settings can discolor resin and warp thin molds.
- Pass 2-3 times, then stop. When new bubbles stop rising, you are done. Overheating drives off additives and can cause fisheyes.
- Let the surface rest. Give the resin a minute between passes so heat does not build up.
Safety essentials
- Ventilation: Work near an open window, a box fan pulling air away, or a fume hood. Uncured epoxy and hardener vapors are respiratory irritants, and heat increases off-gassing.
- PPE: Nitrile gloves, safety glasses, and a NIOSH-approved respirator rated for organic vapors. A dust mask is not enough.
- Fire risk: Keep the gun away from paper towels, alcohol wipes, rags, and solvent fumes. Isopropyl alcohol vapors are flammable, so never spray alcohol near an active heat gun or torch.
Heat gun vs. torch vs. isopropyl alcohol
- Heat gun: Broad, gentle warmth. Best default for beginners and for larger flat pours. Slower to clear stubborn clusters.
- Torch: Fast, pinpoint flame that pops bubbles almost instantly. Higher risk of scorching, warping, and fire. Keep the flame moving, hold it well above the surface, and never use it near solvents or paper.
- Isopropyl alcohol (91% or higher): A light mist from a spray bottle breaks surface tension so bubbles pop on their own. Use it sparingly; too much dulls the finish and can leave a haze. Keep it away from open flames.
When heat will not help
Heat only reaches the top few millimeters. Bubbles trapped below the surface, around inclusions, or inside a thick pour won't respond. Stop heating and switch to the layering and sealing methods covered elsewhere in this guide; continuing to heat a gelling pour only risks scorching the surface while the real bubbles stay put.
Sealing Porous Materials Before Resin Pour
Sealing porous materials before resin is non-negotiable if you're pouring over wood, stone, fabric, or paper. Porous surfaces release air when resin contacts them.
Porous materials have tiny holes; when resin contacts them, air inside escapes as bubbles. A seal coat prevents this.
Here's how to seal properly:
- Apply a thin seal coat, Pour a thin layer of resin (about 1/8 inch) over the porous surface first.
- Let it cure fully, Wait until it's completely hard (check your resin's cure time, usually 24 hours).
- Sand lightly if needed, If the seal coat is rough, sand it smooth with fine-grit sandpaper.
- Pour your main layer, Now pour your regular layers on top. The seal coat prevents air from rising through the porous material.
Materials that need sealing:
- Wood (all types)
- Stone and concrete
- Paper and cardboard
Non-porous materials like glass, metal, and smooth plastic don't need sealing. Resin doesn't release air from these surfaces.
Troubleshooting Bubbles After Curing
Most guides stop at prevention. The harder problem is diagnosing bubbles after the resin has cured, because the fix depends on where the bubble sits and when you noticed it. Use this decision guide to match the symptom to the right repair.
Step 1: Identify the bubble location
- Surface bubbles: Open craters or pinholes on the top face. You can feel them with a fingernail.
- Substrate bubbles: Bubbles rising from wood, stone, fabric, or another porous base. They cluster near the bottom of the pour and often appear as a ring or patch.
- Mold bubbles: Bubbles trapped against the mold wall, usually on the sides, edges, or in undercuts and narrow cavities.
Step 2: Match the fix to the location
Surface bubbles (open pinholes)
- Sand the area flat with 220-grit, then step up to 400, 800, and 1500 grit.
- Wipe with isopropyl alcohol and let it dry completely.
- Apply a thin flood coat of fresh resin over the whole face, not just the spot, so the repair blends.
- Cover to keep dust out and let it cure fully.
Substrate bubbles (rising from porous material)
These usually mean the seal coat was too thin or skipped. If the bubble is shallow, sand back to bare substrate, re-seal with a thin coat, let it cure, then re-pour. If deep, the practical fix is often to sand the top flat and accept the lower defect, or start over with a proper seal coat.
Mold bubbles (sides and edges)
- If the mold is still on and the resin is not fully cured, you can sometimes work the bubble out with a toothpick or pin.
- After cure, sand the affected edge and re-polish. For deep edge voids, fill with a drop of fresh resin, let it cure, then sand and polish flush.
Inclusion bubbles
- Shallow halos: sand down to the bubble, clean, and flood with a thin coat.
- Deep halos: drill a tiny relief hole with a pin, wick in thin resin, and let it cure. This is slow and not always invisible.
- Prevention beats repair here. Seal inclusions first, brush resin into mold details before the main pour, and pour slowly around objects.
Internal voids (fully encased)
- If the void is within about 1/4 inch of the surface, sand down to it, clean, and fill with fresh resin.
- If it is deeper, your realistic options are to accept it as a design feature, drill and fill (visible), or recast the piece. Deep voids cannot be removed without cutting into the work.
Step 3: Repair workflow that works for most surface defects
- Assess depth. Press a pin into the bubble. If it is shallow, sanding alone may remove it.
- Sand progressively. 220 to remove material, 400 to refine, 800 and 1500 to prep for polish.
- Clean thoroughly. Isopropyl alcohol, then a lint-free cloth. Any dust left behind shows in the repair.
- Fill or flood. Small pinholes get a drop of resin; larger areas get a thin flood coat.
- Cover and cure. Dust is the enemy of a clean repair. Use a dust cover or a closed box.
- Sand and polish the repair. Wet-sand from 800 up to 3000, then polish with a resin compound.
Step 4: Know when to stop
Not every bubble is worth chasing. Deep internal voids, bubbles behind opaque inclusions, and bubbles on the underside of a piece are often invisible in the finished work. Repairing them risks making the surface worse. Reserve repairs for defects a viewer will actually see.
Prevention beats repair
Every repair above is slower and riskier than preventing the bubble in the first place. Warm your components, mix slowly, seal porous surfaces, brush resin into mold details, and pour in thin layers. Do those five things and this troubleshooting section becomes a reference you rarely need.
Frequently Asked Questions
Why are there bubbles in my resin?
Bubbles form when air gets trapped during mixing, pouring, or curing. Common causes include stirring too vigorously, pouring resin from too high, using cold resin that's thick and viscous, or not letting the mixed resin sit before pouring. Porous surfaces like wood also release trapped air into the resin. Identifying when bubbles form, during mixing, immediately after pouring, or deep in the cure, helps you fix the root cause.
How do you prevent bubbles in deep-pour epoxy without bubbles?
For deep pour epoxy projects, use a slow-setting resin with lower viscosity, warm your components before mixing to reduce thickness, and pour in thin layers rather than one thick layer. Allow each layer to cure partially and release trapped air before pouring the next. This layered approach gives bubbles time to rise and escape. Mix slowly and pour in a thin stream from low height, and use a heat gun briefly on the surface to help remaining bubbles float up.
Does warming resin help remove bubbles?
Yes. Warming your resin and hardener components before mixing reduces viscosity, making it easier for trapped air to escape. Place sealed bottles in warm water (around 100-110°F) for 15-20 minutes before mixing. Thinner resin flows more smoothly during pouring and allows bubbles to rise faster during the cure. However, avoid overheating, excessive temperature can speed up the cure time and trap bubbles instead of releasing them.
Can you use a heat gun to remove bubbles from cured resin?
A heat gun can remove surface bubbles from wet resin during the first few hours after pouring, but it cannot fix bubbles trapped deep inside cured resin. Hold the heat gun 6-8 inches above the surface and move it slowly across the resin, the heat reduces surface tension and helps bubbles float to the top. Once resin fully cures, surface bubbles can be sanded smooth or filled with a thin seal coat, but internal bubbles are permanent.